
Hey folks! Autumn is inspiration and leaves. The melody of the wind and the beauty of the golden lakes. Everyone had a question on how to draw a chestnut leaf. The question came to me when I was watching my wife @maya painting leaves. It became interesting to me to consider the complex shape of such a leaf, and I started doing it. I created my tutorial step by step. Just like we painted with you Galaxy In The Bottle With Watercolor. This is a very useful practice that will help each of us feel more confident when we draw leaves. Well, let’s not talk long, so as not to frighten off our inspiration. Let’s get down to drawing.
For drawing an easy horse chestnut leaf with a pen, you need to have these materials.
- Watercolor paper 140 gsm (94.5lb)
- Pencil HB
- Gel pen 0.5
- Eraser
You may use other materials, but the result may be different. So enjoy the process and not the result.
How To Draw Step By Step:
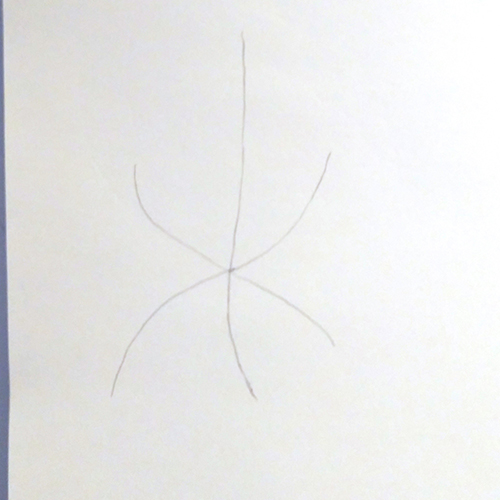
1. Draw leaf veins, three C-curved lines.
2. Draw oval shapes around each line.

3. Make zigzag cutouts in these ovals. Start at the bottom and gradually move up.
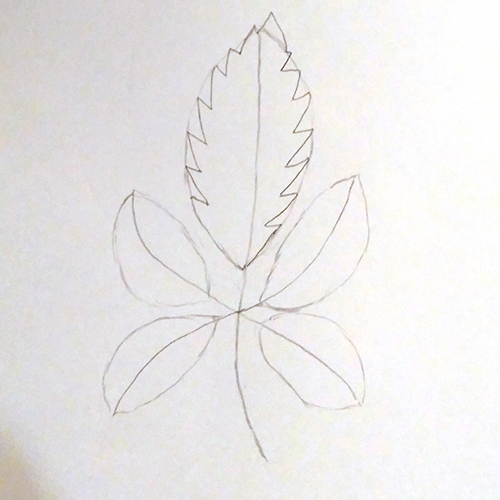
4. Make the previous step for each leaf.

5. Erase unnecessary details and lines with the eraser. Make the correct leaf shape.

6. Draw the contours of the leaf with a gel pen or brush pen. Then draw the veins of the leaf. Draw them from the outside of the leaf to the stem. You can bend the line a little to give it volume.

7. Apply shadows and highlights. Draw lines from the vein to the edge of the leaf with a pencil. The lines are thin and slightly curved. Draw with a pen in short lines from the stem to the top. Fill the top of the leaf with small lines indicating the depth.
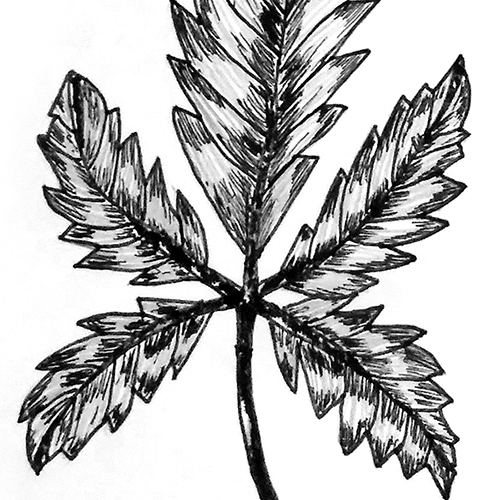
8. Check all inaccuracies and add details as needed.

Happy drawing.

This is a very helpful tutorial 👏 thank you for sharing 💖💖🍁
LikeLiked by 1 person
Thank you so much 😍💝💞💖
LikeLiked by 1 person